How To Put Up Led Lights Without Ruining The Paint? A Complete Guide
LED lights have become a popular way to enhance the ambiance of any room. They come in various colors and designs and are easy to install. However, installing them can be a tricky task, especially if you want to avoid damaging the paint on your walls. After all, repainting a room can be an expensive and time-consuming process.
Luckily, there are several ways to put up LED lights without ruining the paint on your walls. In this article, we will provide you with tips and techniques to install LED lights without damaging your walls.
We will also discuss how to choose the right adhesive, plan the placement of the LED lights, and remove them without any residue. With these simple steps, you can transform your living space with LED lights without worrying about ruining your walls.
Step 01: Prepare the Surface
Before installing LED lights on your walls, it’s essential to prepare the surface to ensure a clean and secure installation. Here are some steps to follow:
Clean the Wall Thoroughly with a Damp Cloth
To avoid dirt, dust, or debris from getting stuck between the LED lights and the wall, clean the wall with a damp cloth.
If the wall is especially dirty, use a mild soap solution to remove any grease or stains. Allow the wall to dry completely before proceeding to the next step.
Wait for the Wall to Dry Completely
Moisture on the wall can cause the adhesive to weaken and reduce the lifespan of the LED lights.
It’s important to wait until the wall is completely dry before attaching the LED lights. You can use a dry cloth or a fan to speed up the drying process.
Use Painter’s Tape to Protect the Surrounding Areas from the LED Lights
To avoid accidentally painting or damaging the surrounding areas, use painter’s tape to cover the baseboards, trim, or any other surfaces near the LED lights.
This will create a barrier between the LED lights and the adjacent walls or objects, preventing damage to the paint. Make sure to apply the tape evenly and securely, and remove it immediately after the installation is complete.
Step 02: Choose the Right Adhesive
Choosing the right adhesive is crucial to ensure that the LED lights stay securely attached to the wall without damaging the paint. Here are some tips to help you choose the best adhesive for your LED lights:
Explain the Difference Between Permanent and Removable Adhesives
There are two main types of adhesives: permanent and removable. Permanent adhesives are designed to create a strong, long-lasting bond and are difficult to remove.
On the other hand, removable adhesives are designed to be easily removed without leaving any residue.
Advantages and Disadvantages of Both Types
Permanent adhesives are ideal for long-term installations, but they may cause damage to the wall if removed.
Removable adhesives, on the other hand, are easy to remove and don’t damage the wall, but they may not be as strong and durable as permanent adhesives.
Is Slower Charging Better For Battery; Must Read
RLC Talk
Suggestions for the Best Type of Adhesive for LED Lights
For LED lights, it’s best to use removable adhesives that are strong enough to hold the lights securely but can be easily removed without damaging the wall. Double-sided adhesive tape, command strips, and poster putty are good options for LED lights.
Double-sided adhesive tape is ideal for lightweight LED strips, while command strips are better suited for heavier panels. Poster putty is a temporary option that can be used to hold LED lights in place temporarily.
When choosing an adhesive, make sure to read the instructions carefully and test it on a small area of the wall before installing the LED lights.
Step 03: Plan the Placement of the LED Lights
Once you have prepared the surface and chosen the right adhesive, it’s time to plan the placement of the LED lights. Here are some steps to follow:
Determine the Ideal Location for the LED Lights
Consider the purpose of the LED lights and the ambiance you want to create in the room. You can place them along the baseboards, on the ceiling, behind the TV or furniture, or in any other location that suits your needs. Make sure to measure the length of the LED lights and mark the placement on the wall.
Use a Level to Ensure They are Straight
Using a level will ensure that the LED lights are straight and evenly aligned. It’s crucial to check the level at every few inches, especially if you’re installing a long strip of LED lights.
Test the Lights Before Permanently Attaching Them
Before attaching the LED lights permanently, test them to ensure they work correctly. Plug in the lights and check for any defects or malfunctions. This will save you the trouble of having to remove the lights after attaching them.
Step 05: Install the LED Lights
Now that you have planned the placement of the LED lights, it’s time to install them. Here are some steps to follow:
Apply the Adhesive to the Back of the LED Strip or Panel
Apply the adhesive to the back of the LED strip or panel according to the manufacturer’s instructions. Make sure to apply the adhesive evenly and avoid any air bubbles.
Carefully Press the LED Lights onto the Wall
Align the LED lights with the markings on the wall and press them gently into place. Avoid applying too much pressure, as this can cause the LED lights to break or damage the adhesive.
Use Additional Adhesive for Added Security
For added security, use additional adhesive in areas where the LED lights may be under stress, such as corners or bends.
This will prevent the LED lights from falling off or coming loose over time. Make sure to use an adhesive that is compatible with the type of adhesive you used to attach the LED lights.
Step 06: Removing the LED Lights
When it’s time to remove the LED lights, you want to do it without damaging the wall or leaving behind any residue. Here are some steps to follow:
Steps to Remove LED Lights Without Damaging the Wall
First, remove any clips or brackets that are holding the LED lights in place. Then, gently pull the LED lights off the wall, using a slow and steady motion.
If the LED lights are difficult to remove, use a hairdryer to warm up the adhesive, making it easier to remove. Once the LED lights are removed, use a damp cloth to wipe away any remaining adhesive residue.
Tips for Cleaning Up Leftover Adhesive
If there is leftover adhesive on the wall, you can use rubbing alcohol or adhesive remover to clean it up.
Apply the solution to a cloth and gently rub the adhesive until it’s removed. Once the adhesive is removed, clean the wall with a damp cloth to remove any remaining residue.
Current Events: Can a Ground Wire Shock You or Just Electrify Your Life?
rlc talk
Conclusion
Putting up LED lights can be a fun and easy way to add ambiance to your home. By following these tips and techniques, you can install LED lights without damaging your paint:
- Prepare the surface by cleaning the wall and protecting surrounding areas with painter’s tape.
- Choose the right adhesive that is strong enough to hold the LED lights in place but can be easily removed without damaging the wall.
- Plan the placement of the LED lights and use a level to ensure they are straight before attaching them.
- Test the LED lights before permanently attaching them and use additional adhesive for added security.
- When it’s time to remove the LED lights, follow the steps carefully to avoid damaging the wall or leaving any residue.
With these tips, you can experiment with different LED light placements and create a unique and personalized atmosphere in your home.
Some related FAQs
Do LED lights fade paint?
LED lights do not typically fade paint. However, if you leave the LED lights on for extended periods or use low-quality LED lights, there is a possibility that they may emit a small amount of heat or UV radiation that could potentially cause some fading or discoloration over time. To avoid this, use high-quality LED lights and limit their usage to reasonable periods.
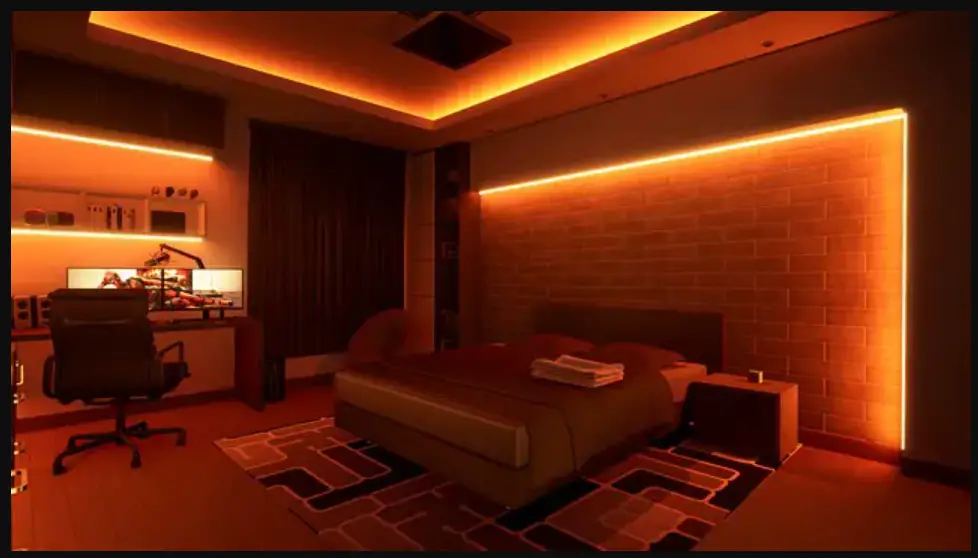
That is the best LED colour to sleep too?
The best LED color to sleep to is generally considered to be a warm, soft white or a light orange/yellow color, which creates a cozy and relaxing atmosphere. These colors have a lower color temperature and can help to promote melatonin production, which is important for a good night’s sleep. Blue and bright white LED lights, on the other hand, can have the opposite effect by suppressing melatonin production and making it more difficult to fall asleep