How to Test a DC Motor? Step By Step Guide
To test a DC motor, disconnect it from the power source and inspect for any visible damage. Use a multimeter to measure continuity and resistance, and check for open or short circuits. Apply power to the motor and observe its rotation, speed, and torque for performance evaluation.
Testing a DC motor is crucial in diagnosing and resolving performance or functionality issues. Testing can provide valuable insights whether you’re dealing with a malfunctioning motor or just want to ensure its optimal operation. You can effectively test its electrical and mechanical characteristics by understanding the basics of a DC motor and using the right tools and techniques.
In this article, we will guide you through the process of testing a DC motor, equipping you with the knowledge to assess its health and identify any potential problems.
What are the Basics of a DC Motor?
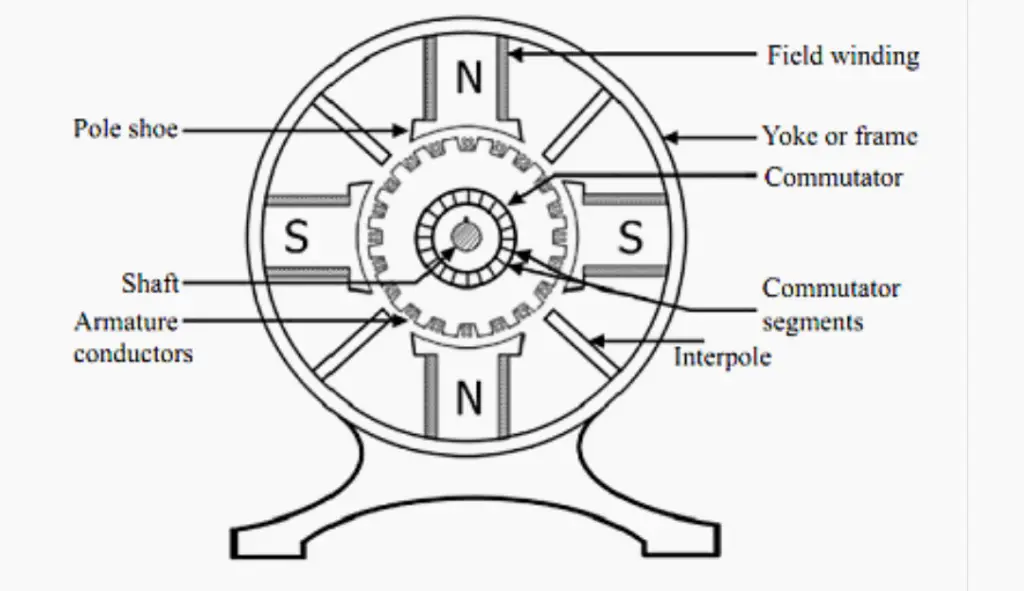
Before diving into the testing process, it’s essential to have a basic understanding of how a DC motor works. A DC motor consists of several key components, including a stator, rotor, commutator, and brushes. The stator houses the permanent magnets, while the rotor holds the wire coils. When an electric current is passed through the coils, a magnetic field is generated, causing the rotor to rotate. This rotational motion is used to drive mechanical devices.
DC motors come in various types, such as brushed and brushless motors, each with its own advantages and applications. Brushed motors use brushes and a commutator to control the flow of electric current, while brushless motors utilize electronic circuits for this purpose. Understanding these distinctions will help you tailor your testing approach accordingly.
What are the tests performed in DC motor?
Tests performed on a DC motor include:
- Visual Inspection
Check for any physical damage, loose connections, or signs of wear and tear.
- Continuity Test
Use a multimeter to verify the continuity of the motor’s windings. This ensures that there are no breaks in the wiring.
- Resistance Test
Measure the resistance of the motor’s armature and field windings using a multimeter. This helps identify any faults or anomalies in the windings.
- Open Circuit Test
Apply a voltage to the motor’s armature and measure the resulting current. This test helps determine the motor’s speed and no-load characteristics.
- Short Circuit Test
Short-circuit the motor’s armature and measure the resulting current. This test helps determine the motor’s torque and performance under load.
- Load Test
Apply a known mechanical load to the motor and observe its ability to maintain speed and torque. This test evaluates the motor’s overall performance and efficiency.
- Insulation Test
Using a megohmmeter, check the insulation resistance between the motor’s windings and the motor frame. This test ensures the motor’s insulation is intact and prevents electrical leakage.
By performing these tests, you can assess the condition, functionality, and performance of a DC motor.
How to Test a DC Motor? Step By Step Guide
Tools and Equipment Needed for Testing
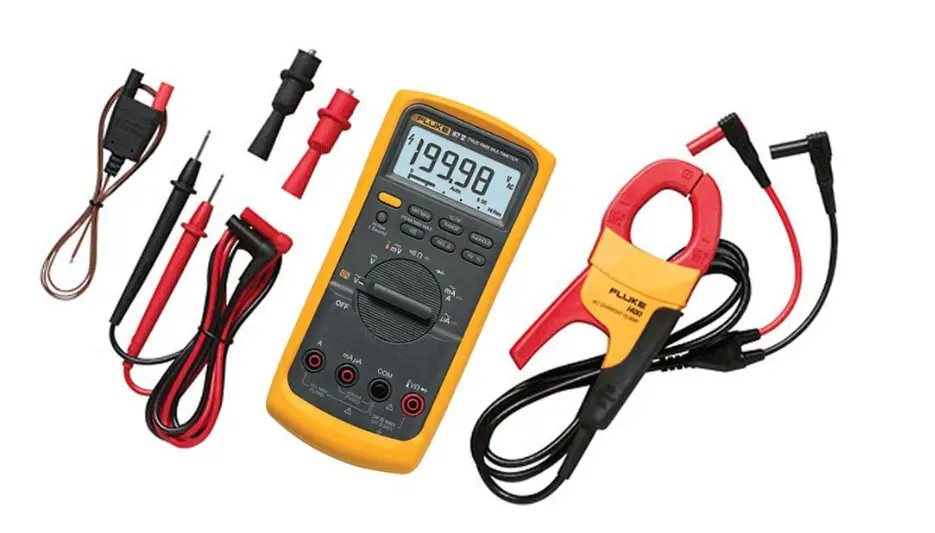
You’ll need a few essential tools and equipment to accurately test a DC motor. The primary tool is a multimeter, which allows you to measure voltage, current, and resistance. Ensure your multimeter can read DC values and has appropriate settings for the expected motor parameters. Additionally, you’ll need test leads and probes to connect the multimeter to the motor’s terminals.
A power supply or battery is required to energize the motor during testing. Selecting an appropriate power source based on the motor’s voltage and current requirements is crucial. Lastly, don’t forget to equip yourself with safety gear, including gloves and safety glasses, to protect against potential electrical hazards.
Preparing for Testing
- Before starting the actual testing, take the necessary precautions to ensure your safety and prevent any damage to the motor.
- Begin by disconnecting the motor from the power source to avoid accidental energization during testing.
- Carefully inspect the motor for any visible signs of damage, such as frayed wires or burnt components. If you notice any issues, addressing them before proceeding with testing is recommended.
Conducting Electrical Tests
One of the key aspects of testing a DC motor is assessing its electrical characteristics. This involves measuring continuity, resistance, and checking for any open or short circuits.
- Start by using the multimeter’s continuity function to test the motor’s windings for continuity.
- Touch the probes to the appropriate terminals and verify that there is a continuous connection.
- Next, measure the motor’s resistance using the multimeter’s resistance function. This can help identify any potential issues with the windings or other electrical components. Compare the measured resistance values with the motor’s specifications to determine if they fall within an acceptable range.
Testing Motor Performance
In addition to electrical tests, evaluating the motor’s performance is crucial. Apply power to the motor from a suitable power supply or battery, ensuring that the voltage matches the motor’s requirements. Observe the motor’s rotation and check if it spins freely without any unusual noise or resistance. A smooth and consistent rotation is an indicator of a healthy motor.
You can also measure the motor’s speed and torque using specialized equipment or motor testing devices. These measurements provide insights into the motor’s efficiency and performance under different load conditions. By analyzing the speed and torque values, you can determine if the motor is operating optimally or if there are any abnormalities.
Interpreting Test Results
Once you have completed the testing process, it’s time to interpret the results. Analyze the readings and values obtained from the electrical and performance tests.
Compare them to the motor’s specifications or consult the manufacturer’s documentation to identify any deviations. Any significant deviations may indicate potential motor issues that need further investigation or repair.
In case you encounter problems during testing or the results indicate a faulty motor, you can refer to common troubleshooting guides or seek professional assistance. Identifying the root cause of the issue will help you take appropriate measures to rectify the problem and ensure the motor’s optimal performance.
How to test a dc motor with brushes?
Here’s a step-by-step guide on how to test a DC motor with brushes:
Step 1: Visual Inspection
- Inspect the brushes for any signs of wear, damage, or excessive dirt.
- Ensure the brushes are making proper contact with the commutator.
Step 2: Continuity Test
- Set your multimeter to the resistance mode.
- Touch the probes of the multimeter to the brush contacts.
- You should get a low resistance reading, indicating a good connection.
Step 3: Power Supply Preparation
- Prepare a power supply or battery that matches the motor’s voltage rating.
Step 4: Motor Connection
- Identify the motor’s positive (+) and negative (-) terminals.
- Connect the positive terminal of the power supply to the positive brush contact and the negative terminal to the negative brush contact.
Step 5: Starting the Motor
- Gradually increase the power supply voltage.
- Observe if the motor starts running smoothly without any sparking or arcing at the brush contact points.
- If there is excessive sparking or arcing, it may indicate a problem with the brushes or commutator.
Step 6: Load Test (optional)
- Connect a mechanical load to the motor shaft if you want to perform a load test.
- Observe if the motor can handle the load and maintain its speed without overheating or stalling.
Step 7: Recording Results
- Document your observations, including the motor’s performance, any abnormal behavior, and the overall condition of the brushes.
Remember, safety is paramount when working with electrical components. Always follow proper safety precautions and consult a professional if you’re unsure or uncomfortable performing these tests.
rlctalk.com
Conclusion
Testing a DC motor is a valuable process that allows you to assess its health, identify potential issues, and take necessary actions for maintenance or repair. You can effectively evaluate its electrical and mechanical characteristics by understanding the basics of a DC motor, using the right tools, and following proper testing procedures. Regular motor testing is essential for maintaining optimal performance and preventing unexpected failures. With the knowledge gained from this article, you’ll be better equipped to test DC motors and ensure their smooth operation in various applications.