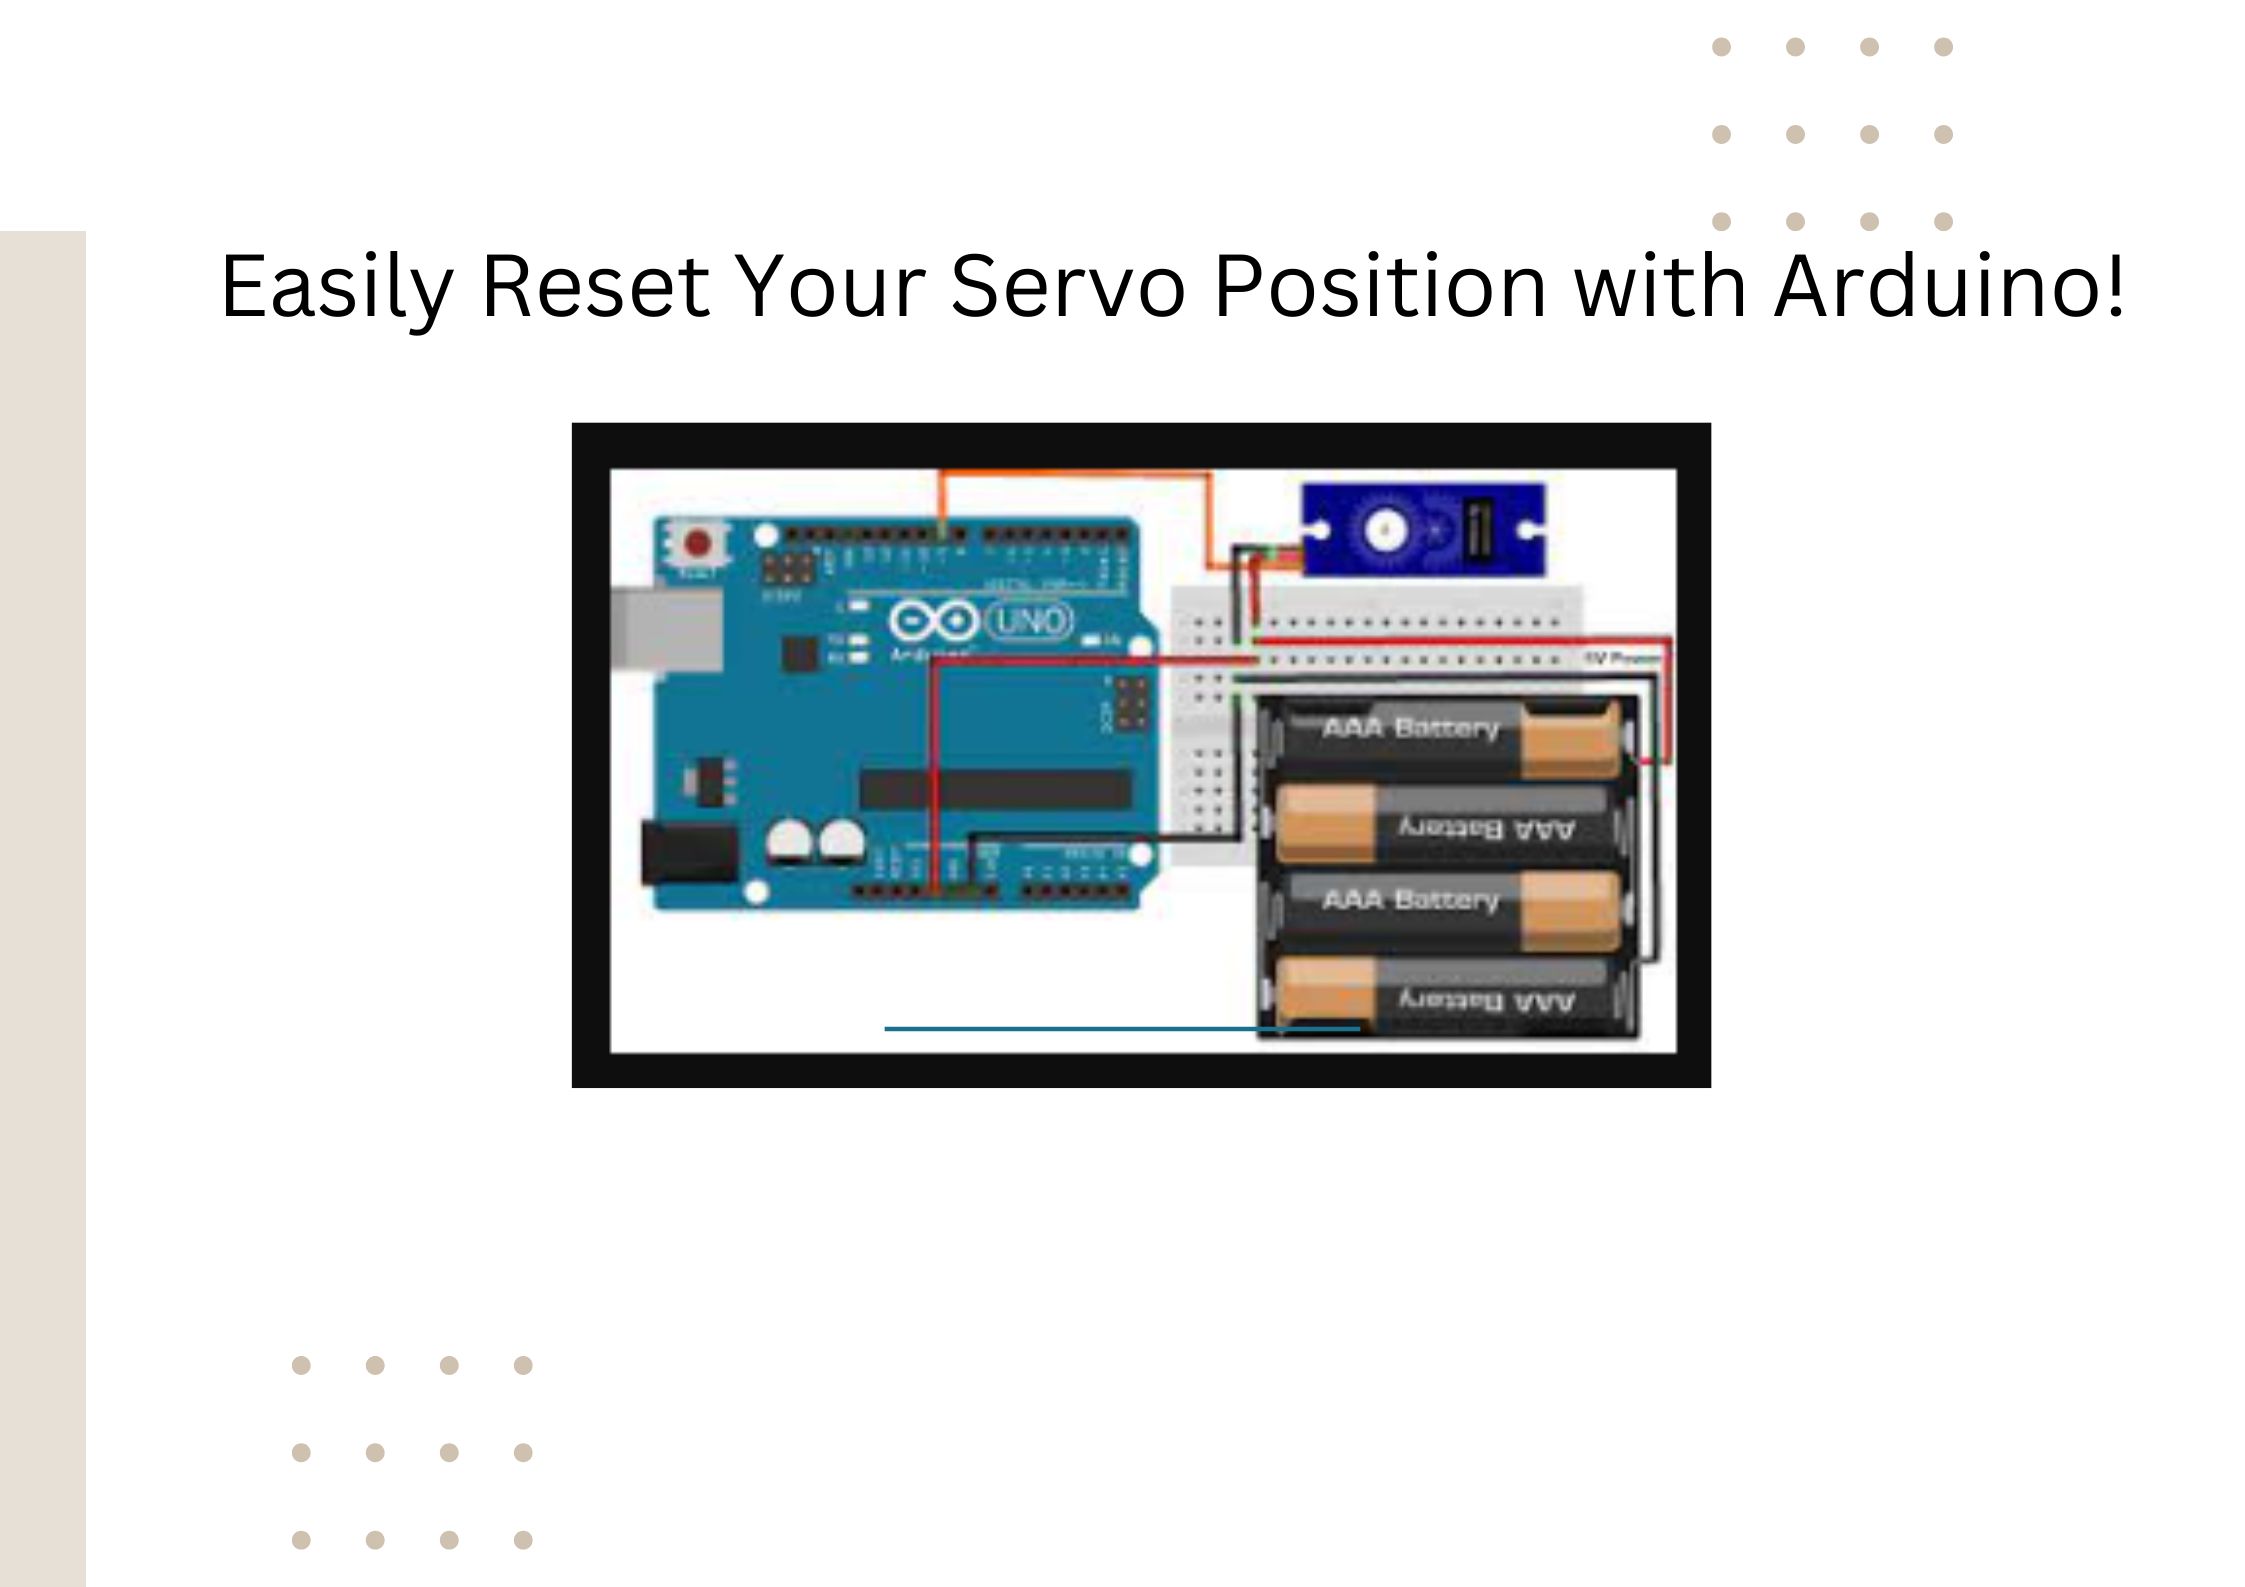
Easily Reset Your Servo Position with Arduino!
Servo motors are commonly used in a variety of applications, from robotic projects to automated systems. However, over time, servo motors may drift from their desired position, which can lead to incorrect movements and decreased accuracy. This can be especially frustrating for makers and hobbyists who are looking to create precise, controlled movements.
If you’ve ever encountered the problem of a servo motor drifting from its desired position, you know how frustrating it can be. It can be difficult to manually adjust the position of a servo motor, and even more challenging to make precise, accurate movements. The results of a drift in servo position can be disastrous, leading to incorrect movements and decreased functionality.
The good news is that resetting the position of a servo motor can be easily achieved with the help of an Arduino microcontroller. In this comprehensive guide, we’ll walk you through the steps of resetting your servo position using an Arduino, so you can get back to making precise, controlled movements with ease.
Introduction to Arduino Servo Motors
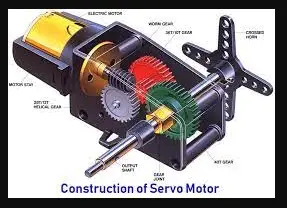
Servo motors are an essential component in many robotics projects, as they allow for precise control over the speed and position of the motor.
A servo motor operates using a feedback system that takes signals from the controller, in this case the Arduino microcontroller, to determine how fast or far the motor should move.
The feedback system helps the motor maintain its position and speed even when the signal from the controller changes.
ERROR COMPILING FOR BOARD ARDUINO/UNO: HOW TO FIX
rlc talk
How Servo Motors Work
Servo motors use a feedback system to control their speed and position. The motor receives a signal from the controller, in this case the Arduino, which tells it how fast or far to move. The motor then adjusts its speed and position accordingly.
The feedback system helps the motor maintain its position and speed even when the signal from the controller changes. This feedback loop makes servo motors ideal for robotics projects that require precise control over movement.
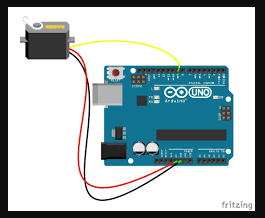
Arduino and Servo Motors
The Arduino is a popular microcontroller platform that can be used to control servo motors. Its low cost and open-source nature make it an accessible and versatile tool for makers and hobbyists.
The Arduino can be used to control servo motors in a variety of ways, including adjusting their position and speed. By programming the Arduino, users can create custom control systems for their servo motors, allowing for even greater precision and control.
Preparing the Arduino IDE for Servo Motor Control
Before you can start programming your Arduino to control your servo motor, you need to download and install the Arduino IDE. This is a free software that can be used to write, compile, and upload code to the Arduino.
Once you have downloaded and installed the Arduino IDE, you need to configure it to work with your servo motor. To do this, you will need to install the servo library. This library contains the code necessary to control your servo motor. To install the library, open the Arduino IDE and click the “Sketch” menu. Then click “Include Library” and select “Servo” from the list.
Once you have installed the servo library, you need to set up the Arduino IDE to work with your servo motor. To do this, open the Arduino IDE and select the “Tools” menu. Then select “Board” and select the type of board you are using. Next, select the “Port” and select the port your Arduino is connected to. Finally, select the “Programmer” and select the type of programmer you are using.
What is Exposed electrical conduit? [Pros and Cons Included]
rlc talk
Programming the Arduino to Reset the Servo Position
Now that you have set up the Arduino IDE to work with your servo motor, you can start programming the Arduino to reset the servo position. To do this, you need to write a code that will tell the servo motor to move to a specific position.
To write the code, open the Arduino IDE and start a new sketch. Then enter the following code:
“`
include Servo.h>
Servo myservo;
void setup() { myservo.attach(9); myservo.write(0); }
void loop() { // no code needed } “`
This code will tell the servo motor to move to its starting position, which is 0 degrees. You can change the starting position by changing the number in the “myservo.write(0)” line.
For example, if you want the servo to start at 90 degrees, you can change the code to “myservo.write(90)”.
Once you have written the code, you need to upload it to your Arduino. To do this, click the “Upload” button in the Arduino IDE. The code will then be uploaded to your Arduino and the servo motor will be ready to be controlled.
Resetting the Servo Position
Now that you have uploaded the code to your Arduino, you can reset the position of your servo motor. To do this, you need to use the “Servo” library. The library contains a special command that can be used to reset the position of the servo motor.
To reset the position of the servo motor, open the Arduino IDE and enter the following code:
“`
include Servo.h>
Servo myservo;
void setup() { myservo.attach(9); myservo.write(0); }
void loop() { myservo.reset(); } “`
This code will tell the servo motor to reset its position to 0 degrees. You can change the starting position by changing the number in the “myservo.write(0)” line. For example, if you want the servo to start at 90 degrees, you can change the code to “myservo.write(90)”.
Once you have written the code, you need to upload it to your Arduino. To do this, click the “Upload” button in the Arduino IDE. The code will then be uploaded to your Arduino and the servo motor will be reset to its starting position.
Testing Your Arduino Servo Motor Position Reset
To adjust the code, you need to modify the write function in the loop function. For example, if you want the servo motor to reset to the 0-degree position, you can use the following code:
myservo.write(0);
delay(1000);
In this example, the servo motor will be set to the 0-degree position and will remain in this position for 1 second before it starts moving again.
If the servo motor still does not reset to the correct position, you may need to check the servo motor’s specifications, such as its pulse width range, to ensure that the values you are using in your code are correct.
It is also important to note that the servo motor’s reset position may vary depending on the servo motor model, so you may need to consult the servo motor’s datasheet to determine the correct reset position.
Once the servo motor is resetting to the correct position, you can then continue to test and make further adjustments to the code to achieve the desired movement.
Troubleshooting Arduino Servo Motor Position Reset
If the servo motor is still not resetting to the correct position even after checking the code and connections, there are a few other things you can try.
Check the servo motor specifications
Make sure the values you are using in your code, such as the pulse width range, are correct and match the servo motor specifications. You can consult the servo motor’s datasheet for the correct specifications.
Check the power supply
Ensure that the servo motor is getting enough power. You can check the voltage at the servo motor’s control pin with a multimeter to see if the voltage is within the acceptable range.
Check the servo motor’s control circuit: If the servo motor is still not resetting correctly, there may be an issue with the control circuit. You can use an oscilloscope to measure the pulses sent from the Arduino to the servo motor and check if the pulses are of the correct duration and frequency.
Use a different servo motor
If you have exhausted all other troubleshooting steps and the servo motor still does not reset correctly, you may need to use a different servo motor. Some servo motors may have compatibility issues with the Arduino and may not work properly.
How to Control a Servo Motor with Arduino
Now that you know how to reset the position of your servo motor with Arduino, you can learn how to control the servo motor with Arduino. To do this, you need to use the “Servo” library. The library contains a special command that can be used to control the servo motor.
To control the servo motor, open the Arduino IDE and enter the following code:
“`
include Servo.h>
Servo myservo;
void setup() { myservo.attach(9); myservo.write(0); }
void loop() { myservo.write(90); } “`
This code will tell the servo motor to move to 90 degrees. You can change the position of the servo motor by changing the number in the “myservo.write(90)” line. For example, if you want the servo to move to 180 degrees, you can change the code to “myservo.write(180)”.
Once you have written the code, you need to upload it to your Arduino. To do this, click the “Upload” button in the Arduino IDE. The code will then be uploaded to your Arduino and the servo motor will be ready to be controlled.
Conclusion
As you can see, resetting the position of your servo motor with Arduino is a simple process. With the right knowledge and a few lines of code, you can easily reset the position of your servo motor with Arduino.
Above, we have discussed how to reset the position of your servo motor with Arduino, as well as how to control the servo motor with Arduino. With this knowledge, you should be able to easily control and reset your servo motor with Arduino.